
Friday, August 21, 2015
Apartment For Sale
I realize that I am not done posting the before and after photos of the apartment, but here is the amazing virtual tour that our agent had made for the sale of the condo.
Update on Kitchen Mock-up
Although I had hoped to paint the back of the open cabinetry cream as I said here... I have now accepted reality and, in an effort to save myself time (and a lot of frustration), decided to paint the backs the same grey as the rest of the cabinetry. It will still look really nice and be much easier to paint.
Here is what it will look like now....

And here is what it actually looks like right now...

Even in its current, disheveled, in-progress state it is so much better then this...

Here is what it will look like now....

And here is what it actually looks like right now...

Even in its current, disheveled, in-progress state it is so much better then this...

Friday, August 14, 2015
"To Buy" List for the New House
We are still not actually moved into the new house but I have already made up my "to buy" list.
For the eat-in kitchen:
Old church pew (thrift) for the bench seating (to be painted if it`s in bad condition or not a stain that I like)...

A wood dining table (thrift- can get these for a steal online) that can be extended (painted dark grey- like the kitchen cabinets)...

For the kitchen:
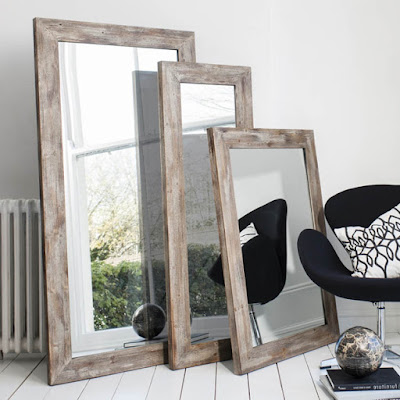
A rustic wood mirror (for above the sink; new or thrift)...

For the bedrooms:

A nice outdoor light (new) and probably some new house numbers to go with it...


For the eat-in kitchen:
Old church pew (thrift) for the bench seating (to be painted if it`s in bad condition or not a stain that I like)...

Two Eames Eiffel chairs (new)...

A wood dining table (thrift- can get these for a steal online) that can be extended (painted dark grey- like the kitchen cabinets)...

For the kitchen:
A rustic wood mirror (for above the sink; new or thrift)...

A faucet (new)...

... and sink and counter...
A pretty light fixture (new) for each room...

For the exterior:

For the bathroom:
A shower head and hand held shower (new)...

Sink faucets (new)...

Bathroom light (new)...

Wednesday, August 12, 2015
Kitchen Mock-up
So I decided to take my ideas one step further and modify the "before" kitchen picture to look like what I am hoping the "after" kitchen will look like.
This is what I was originally thinking but it looks like it will be difficult to straighten some of the doors so it may be easier just to remove them.


If, by some miracle we do not replace the ugly floor tiles, here is what it will look like.

All still MUCH better then where it started off...

This is what I was originally thinking but it looks like it will be difficult to straighten some of the doors so it may be easier just to remove them.

Here is what it will look like without the doors on some of the upper cabinets.

If, by some miracle we do not replace the ugly floor tiles, here is what it will look like.

All still MUCH better then where it started off...

Tuesday, August 11, 2015
Kitchen Inspiration


I think/know it needs a lot of love. I am thinking the following jobs are an immediate must:
- new floors
- paint cabinets
- paint backsplash
- paint french door and walls in the eat-in kitchen
- new closet door
- new window dressings
- new faucet
- new counter-top
Now on to the fun part... inspiration for the makeover of the "new" kitchen.


Monday, August 10, 2015
DIY Project Ten- Pipe Bench
I have been on the hunt for a 6' long bench to fit behind my sofa and for my front door "landing strip" but have had no luck. I love the industrial look so I thought I would give the pipe bench a try.
What's I used:
1 piece rough cut barn-board (cut to 6" length)
8 flanges (galvanized steel)
8 x 3" pieces of pipe (galvanized steel with threaded ends)
4 x 1" pieces of pipe (galvanized steel with threaded ends)
4 corner tees (galvanized steel with female fittings)
1 4' piece of pipe (galvanized steel with threaded ends)
1 can matte black spray paint (galvanized steel with threaded ends)
So here's how it all goes together...
Screw together all the threaded ends in the below configuration. Make sure that all the joints are fashioned securely together and laying flat on the floor.


Stain the barn-board bench surface any colour you like. I choose a dark walnut stain.

Sand down the surface of the bench if it is rough. I liked the colour of the wood after only one coat of stain so I left it at this point. Lastly, add a coat of polyurethane/urethane to protect the bench top. That's all... Ssssoooo happy with the results!
Total cost= $70
What's I used:
1 piece rough cut barn-board (cut to 6" length)
8 flanges (galvanized steel)
8 x 3" pieces of pipe (galvanized steel with threaded ends)
4 x 1" pieces of pipe (galvanized steel with threaded ends)
4 corner tees (galvanized steel with female fittings)
1 4' piece of pipe (galvanized steel with threaded ends)
1 can matte black spray paint (galvanized steel with threaded ends)
So here's how it all goes together...
Screw together all the threaded ends in the below configuration. Make sure that all the joints are fashioned securely together and laying flat on the floor.

Wipe down the metal with soap and water to remove any residue on the pipes. Once the pipes are dry, spray paint the bench base in a well ventilated area. I used matte black paint to give it a rod iron look.

Next, secure the barn-board to the bench base via the upper flanges attached to the bench base.

Stain the barn-board bench surface any colour you like. I choose a dark walnut stain.

Sand down the surface of the bench if it is rough. I liked the colour of the wood after only one coat of stain so I left it at this point. Lastly, add a coat of polyurethane/urethane to protect the bench top. That's all... Ssssoooo happy with the results!
Total cost= $70
Subscribe to:
Posts (Atom)